
 Australian Dollar

How to Install a Floor-Standing Bath Mixer and Spout
Posted by RG Sayson on 23 Apr 2018
A floor-standing bath mixer best complements a freestanding bath, as together they make a stunning impact in any modern bathroom. This floor-mounted mixer is easier to install than it looks—just follow the guide below and see for yourself how simple it can be!
Before Installing Your Freestanding Bath Tap...

Take note of the following as you prepare to set up that floor-standing mixer:
-
Read the product manual of your bath mixer and spout, making sure you follow all instructions.
-
The floor-mounted mixer must be installed by a licensed plumber.
-
Flush all plumbing prior to connecting the mixer.
-
Check the mixer’s maximum water temperature and ideal operating pressure.
-
Install with pressure limiting valves and accessible isolating stop cocks.
The installation procedures below are a general guide and there may be variations depending on the make of your freestanding bath mixer. Follow the installation instructions that come with your floor-standing spout, if present.
Floor-Mounted Spout Installation Tools and Materials
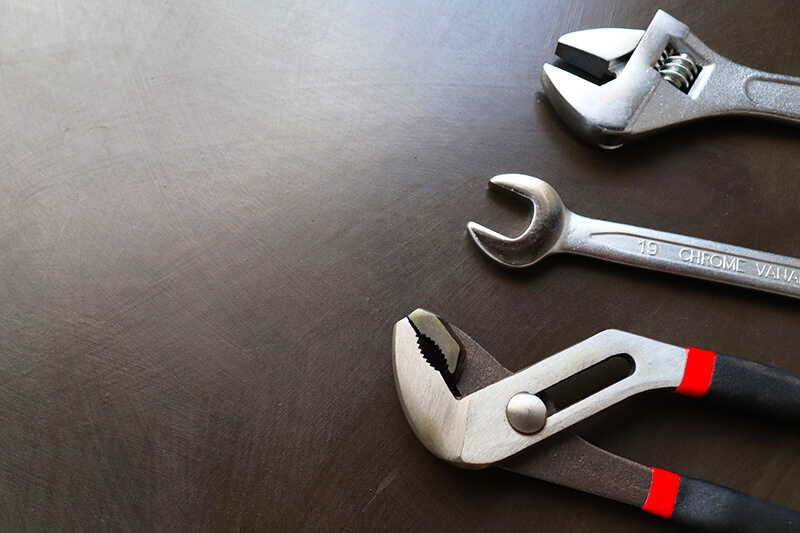
Have the following ready:
-
Philips screwdriver
-
Pliers
-
Adjustable wrench
-
Hex wrench
-
Plumber’s putty
-
Pipe tape (Teflon tape)
-
Safety goggles
-
Torch (optional)
-
Cleanup cloth
Steps in Installing a Floor-Standing Bath Mixer & Tap
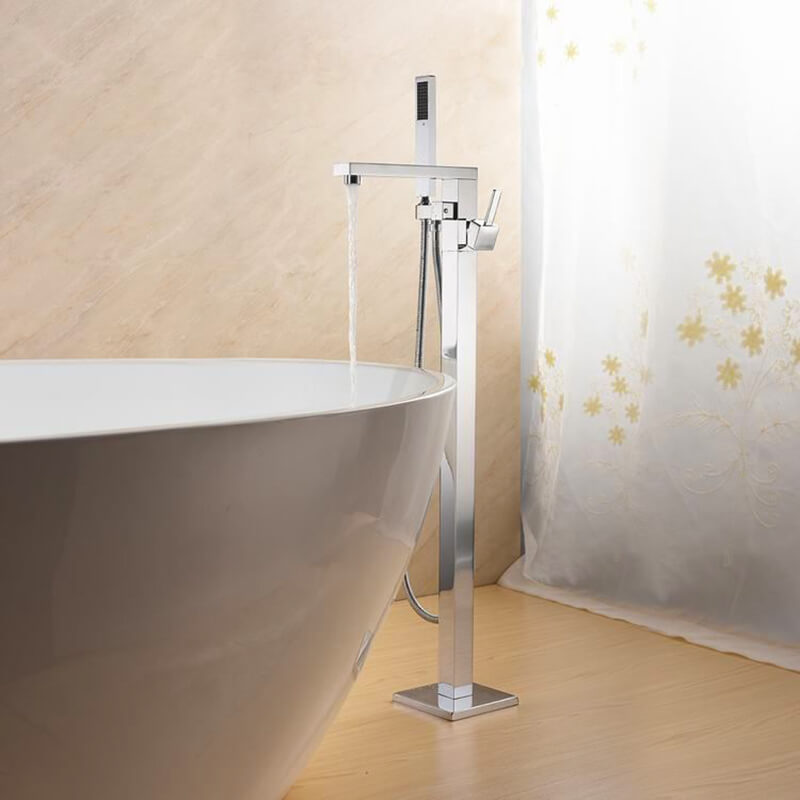
A floor-mounted bath spout can be installed in any of the following ways:
(A) In-floor Box Installation (concealed under-floor box) - advisable before the flooring is installed
(B) Flexi Hose Installation (above-floor connection) - where the first approach is not possible
Do the first method whenever possible because it has the benefit of a lower profile floor plate, which is preferred.
Method A: In-Floor / Concealed Box Installation
Ready? Unpack the mixer set and make sure that all the parts are complete. Below is a diagram to guide you, but it’s best to refer to your own product manual. Note the difference inside the dashed boxes.
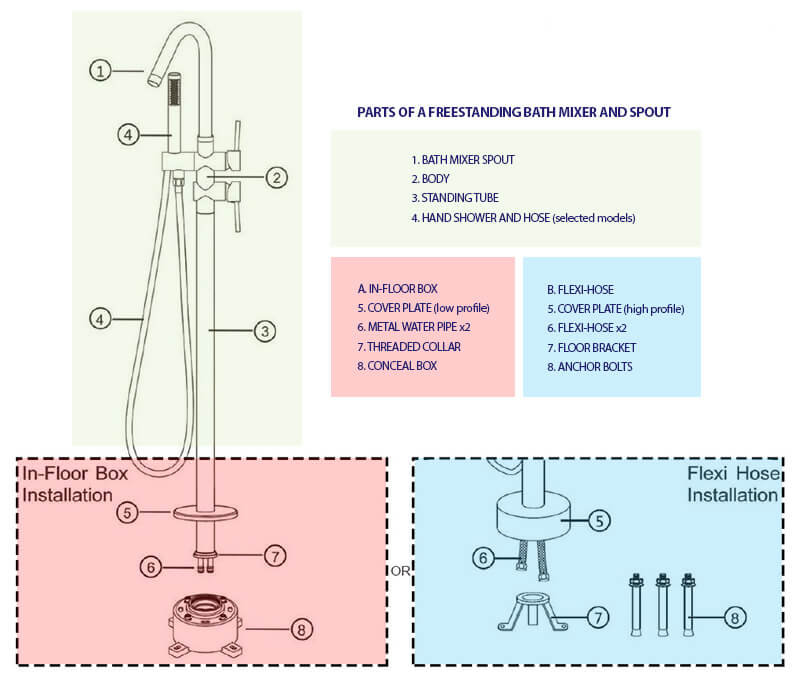
Now, shut off the water supply valves to avoid getting wet and sprayed all over. Let's do this!
1. Installing the In-floor Box
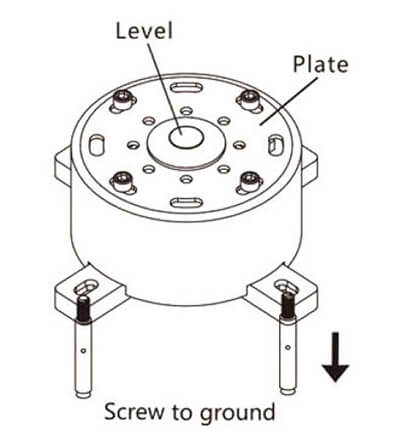
(a) First, prepare a suitable recess on the floor where you will install the in-floor box. This must have accessible hot and cold water supply inputs.
(b) Install the in-floor box with its top level with your (planned) floor finish. Position the in-floor box to align with the water supply inputs. Note that this will be the final spout position when you install the mixer. You may temporarily remove the cover plate to check the position of the outlet ports, as this is where you will later insert the mixer’s inlet pipe. Use masonry anchors if mounting to concrete.
(c) A licensed plumber must connect the hot and cold water inputs to the female inlets.
(d) Retain the cover plate and level indicator on the installed box. This will protect the plumbing from further building works and provide a level measurement check before mixer installation.
2. Setting Up the Mixer
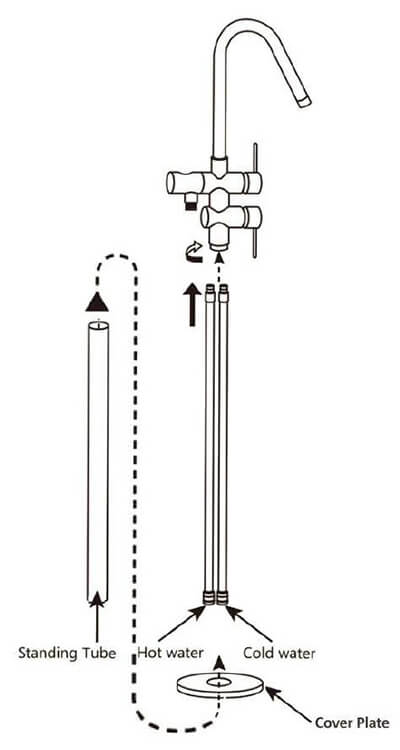
(a) Have your licensed plumber connect the hot and cold water supply pipes securely into the inlets on the base of the mixer head. Make sure you don’t reverse the connection between the hot water supply (H) and the cold water supply (C). Use pipe tape on the threads if necessary.
(b) Slide the outer tube over the water supply pipes and twist it tightly onto the mixer head.
(c) Now slide the floor cover plate over the outer tube.
(d) Screw the brass base threaded collar securely onto the base of the outer tube.
3. Installing the Mixer
(a) Remove the circular metal cover with the level indicator from the in-floor box by removing the 4 hex bolts. Remove the plastic centre protective disc with the level indicator.
(b) Bolt the circular metal cover from the in-floor box to the underside of the brass threaded collar at the base of the mixer tube using supplied hex bolts.
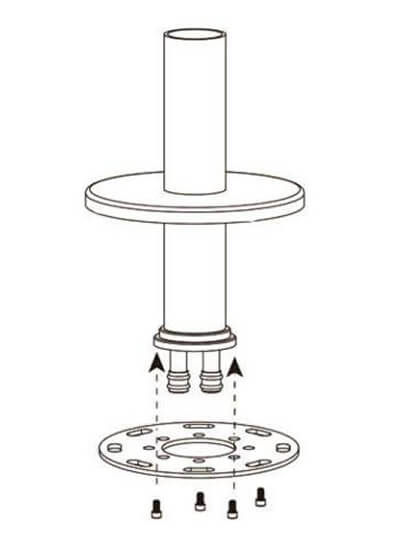
(c) Remove the protective plastic inlet plug from the in-floor box. Insert the hot and cold inlet pipes securely into the outlet ports of the in-floor box.
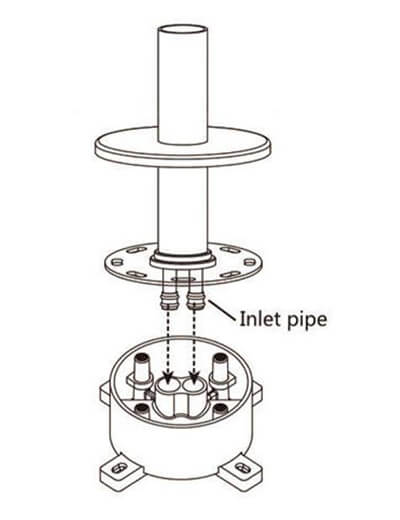
(d) Bolt the in-floor circular metal cover securely back onto the top of the in-floor box. Slide the floor cover plate down to conceal the box.
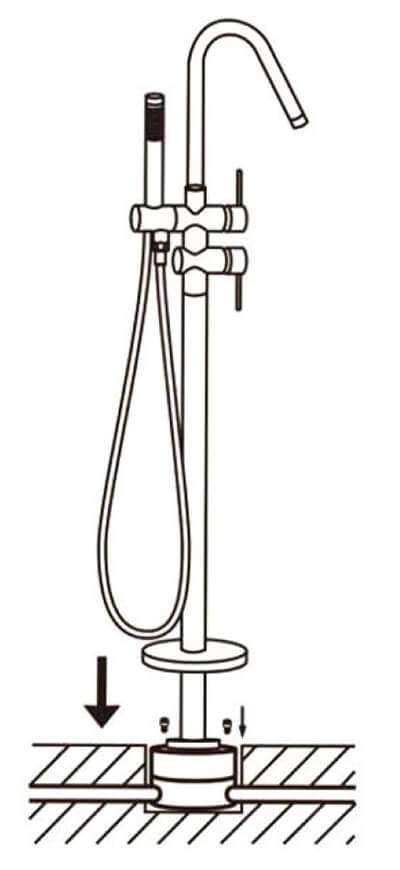
After you’re done, check for leaks before finishing the floor work.
Method B: Flexi-Hose Installation
1. Setting Up the Floor Connections
Pre-install hot and cold supply lines. They should protrude from the floor to connect to the threaded female connectors on the mixer’s input flexi-hoses.
2. Setting Up the Mixer
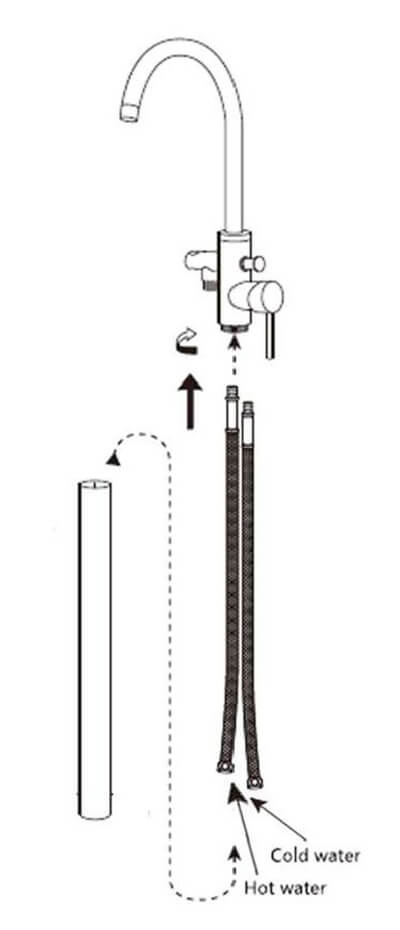
(a) Connect the hot and cold flexi hoses into the base of the mixer head.
(b) Slide the outer tube over the flexi hoses, then secure it tightly onto the mixer head.
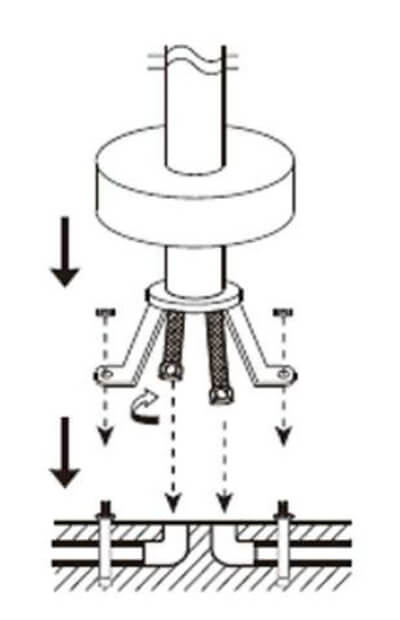
(c) Slide the high-profile floor cover plate onto the outer tube.
(d) Screw the brass fixing feet threaded bracket to the base of the outer tube.
3. Installing the Mixer
(a) Have a licensed plumber connect the hot and cold water inputs to the connectors on the flexi hoses.
(b) Securely affix the fixing feet bracket to the floor with suitable fixings to position the spout in the desired direction.
(c) Slide the floor cover plate down to conceal the floor bracket and hose connections.
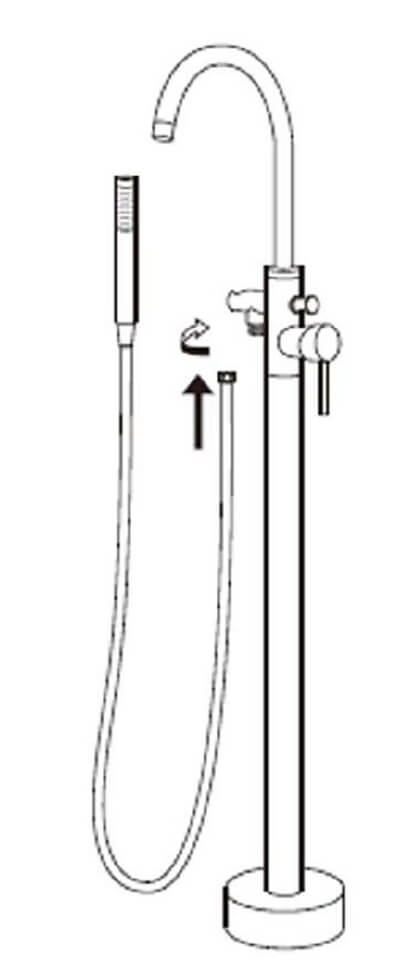
Check for leaks when you’re done.
After Installation
When you’ve finished installing your floor-standing bath mixer, check the water flow and the function of the tub filler spout and the hand shower. If there is any leak, make sure that the parts fit tightly together. If there are none, you’re good to go for a bath!
Renovator Store has a variety of freestanding bath mixers to suit your needs. Our Customer Service team is ready to assist you via chat, via email at service@renovatorstore.com.au, or call us on weekdays at (03) 9544 3003 or 1800 RENOSTORE.